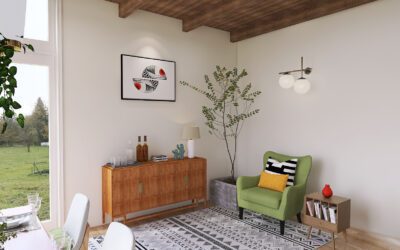
Wall art is the best way to express your creativity and exhibit your personality in your interior space. The choice of art pieces you install on the wall says a lot about your taste and style. But along with choosing the right wall art comes that challenge to place them well. Nothing sticks out like a sore thumb than a wrongly placed wall art.
Placing the art pieces cohesively can be a daunting task. The right height, length, spacing, and orientation can stress even the professionals. But if you keep certain points in mind, the outcome will be breath-taking! So, if you are planning to create a feature wall, stay tuned!
1. How to Select the Right Wall Art
If you are an art connoisseur, you know the deal! But for all the newbies, the best hack to select the correct wall art is to prepare a roadmap. Yes, planning your purchase in advance will help you display it properly and make people drool over your collection.


Understand the interior design style of your room and then work your way through to shortlist the wall art that would match. For instance, an abstract wall art flaunts contemporary interiors, but in traditional rooms, going for classic wall art will enhance the space better.
2. Pay Attention to the Details in the Wall Art
Selecting the wall art pieces is not just restricted to styles. Another important factor to keep in mind is to include the right colours. The texture, shade, and pattern of the wall art can influence the interior space. A great way to anchor the room together is by introducing an oversized wall art featuring all the colours from the interior. This way your room will look more ‘put together’.
But of course, the art does not necessarily need to contain the colours from the interior space. You can also introduce new pops of colour on the art to add a new flavour to the room. Also, the patterns, shapes and textures on the art can change the room’s atmosphere. Curvilinear lines, for example, can soften a room filled with straight angular furnishing. Zigzags and contrasting colours add energy and movement to the room.


3. Placement of the Wall Art
Placing the wall art is probably the trickiest task and most people stumble here. To avoid any visual discomfort, always make sure your framed wall art is placed at the eye level. As a rule of thumb, the center of the wall art should be 57 inches from the ground. This is an average eye-level for a human and provides the correct viewing angle. If you are installing your wall art above a sofa or buffet, make sure it covers up to two-thirds of the width of the setup. Center the wall art pieces with respect to the furniture and allow a few inches of space on all sides.
4. The orientation of Wall Arts
Arranging the framed wall art pieces can be done effortlessly if you follow some simple tips and tricks. The best way to place your wall art is by creating visual symmetry. If you wish to create a feature wall, make sure to install the larger pieces on the bottom left and smaller artwork on the top right side. You can play with different sizes to maintain the overall balance.
For the café style layout try to diversify the wall art to break the monotony. You can include framed fabrics, sculptures, mixed media paintings, and other styles of artwork to complement the look. Mix and match various styles to get a quirky wall. While opting for a salon-style feature wall, remember to respect the shape of the wall while arranging the wall art. For longer walls, spread out the wall art evenly to cover all the areas. Where there are doors, recesses or openings, try to use wall art shapes that create balance.


For a relaxed feel, you can rest the wall art on a mantle, tabletop or wall hung shelves. This looks amazing in modern interiors with a minimalist vibe. Instead of placing one frame, try to layer multiple art pieces of different sizes to create an interesting look. You can also stack two or three on floating shelves to give a multidimensional effect to the wall.


When going for a symmetrical approach, opt for an even number of wall art pieces. Remember to install the wall art in close proximity to one another. Ideally, there should be 2-3 inches of space between all the wall art pieces. On the other hand, if you want to place 3 wall art adjacently, increase the gap to 4-6 inches. Make sure to center the wall art evenly to achieve visual symmetry.


While styling different sized wall art, always put the bigger one on the bottom left and smaller on the top right. Ensure a gradual transition from large to small pieces. Installing the wall art at different heights will cause a distraction due to the unevenness.
5. Have Fun with the Frames
Don’t shy away from picking out different styles. Frames play a crucial role in giving personality to space. Creating a mixed bag of vintage and modern frames can offer a gorgeous feel to space! On the contrary, you can completely ditch the wall frames and go for a shabby appearance too. The roughened edges and withered corners of the paper provides a rustic feel to the room.
For sleeker and more modern styles, many wall art shops offer canvas prints, wood prints and floating frames. These presentations may be part of their customised offerings. So be sure to inquire and get specific price offers for each style type.
How to Install the Wall Art
Framed wall art may end up looking messy when not placed correctly. A great way to prevent this frenzy is by laying out all the frames on the ground and cutting paper cardboard pieces in the same shape. Once you have the cut-outs ready, you can jumble up and work out the best placement for the wall art pieces. Use a painter’s tape to secure these pieces on the wall. When you are happy with the arrangement, mark the spots where the screws will be inserted, and drill a hole there. If you are only dealing with a few frames, you can totally skip the cardboard cut-outs and directly use painter’s tape in the shape and size of the wall art to analyse the layout.
Be careful with the heights and angles of the placements. Nothing looks as painful as a wrongly hung picture frame. Keep in mind the length of the hardware hooks and the amount space between the framed artwork and the wall. While installing a canvas print, remember to mark the correct height at the top and bottom edges of the wall art. The best way to hang lighter wall art canvas is by using adhesive strips of Velcro. Otherwise, you can use nails, sawtooth brackets, or eye hooks to install a canvas.
Just follow these quick tips and tricks to create a stunning statement wall art. Be exploratory and have fun while flaunting your treasured collection.

