Email marketing is a type of direct marketing effort that makes use of electronic mail to communicate messages to a larger audience. Businesses typically use it for brand & product marketing, to build relationships with new customers, enhance existing relationships with current customers, and make big announcements about the business. These emails are not sent via the conventional email client such as Outlook, Apple Mail or Mozilla.
Businesses usually use Email Marketing tools or services to perform this function. Free email marketing services such as Mailchimp are highly efficient in sending out emails to a large pool of recipients. Such a service focuses on ensuring that the emails reach the recipients. It provides well-designed email layouts to draw more engagement and conversion. It also provides reports on bounced emails, number of opens and clicks performed by each recipient.
This makes an email marketing tool perfect for sending out wedding invitations digitally. This is an opportunity to go completely paperless by using a more environmentally-friendly option. An email marketing tool enables you to upload your wedding invitation card design. You can create beautiful email formats with ready-made themes. It is simple to keep track of responses and stay organised with your guest list.
Here’s a detailed guide on how to set up an email campaign to send out your wedding invitations online to your guests.
1. Sign Up
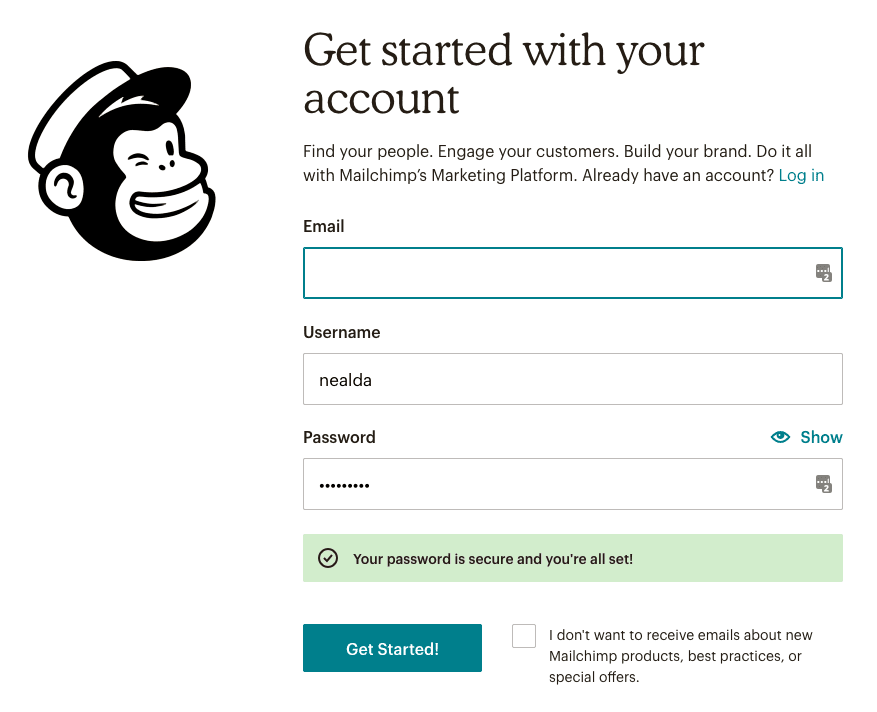
To get started, you need to sign up for a Mailchimp account for free. Mailchimp provides a Free Plan that includes 1 audience or list, up to 2,000 contacts and 10,000 sends per month, with a daily send limit of 2,000. All you have to do is enter your email address, select a username, and fill in a password. Then, click the “Create My Account” option to receive an activation email for you to get started.
After verifying your email address, be sure to open a free account so that you can try out the various features. The paid services are very affordable and open up more functions.

2. Create an audience
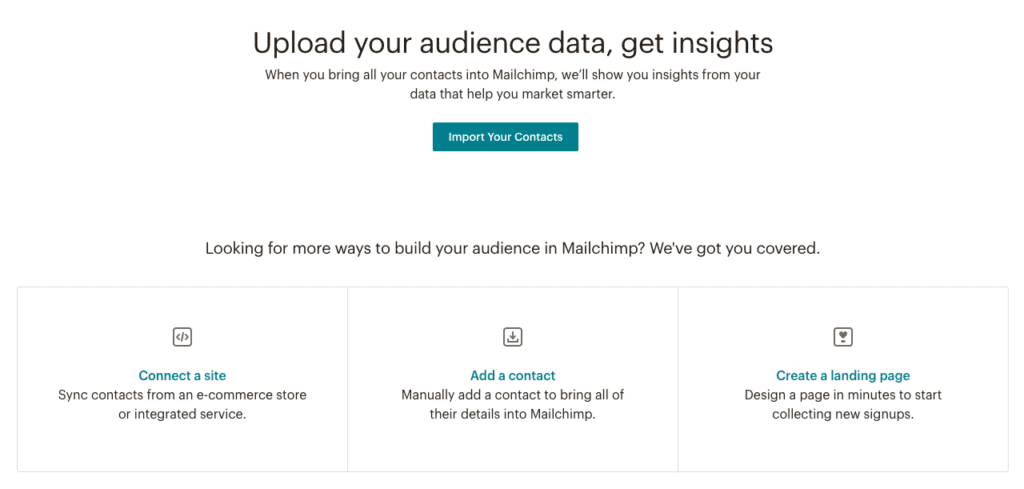
Once you’ve created your account, choose the “Audience” option at the top menu bar. You may now upload the emails of your guest list or add them manually. If you do not have a wedding website, you can create a landing page on Mailchimp. Assign a name to your new audience, maybe “Wedding Guests”. At your audience list, go to Settings > Audience Name and Defaults to enter your own information and name e.g. Sarah & Kyle. Add a statement to remind your guests how they got into your contact list and why they are receiving your emails. If you wish, you may also fill up the default email subject e.g. Wedding of Sarah & Kyle. These default settings can be changed later for every different email campaign.

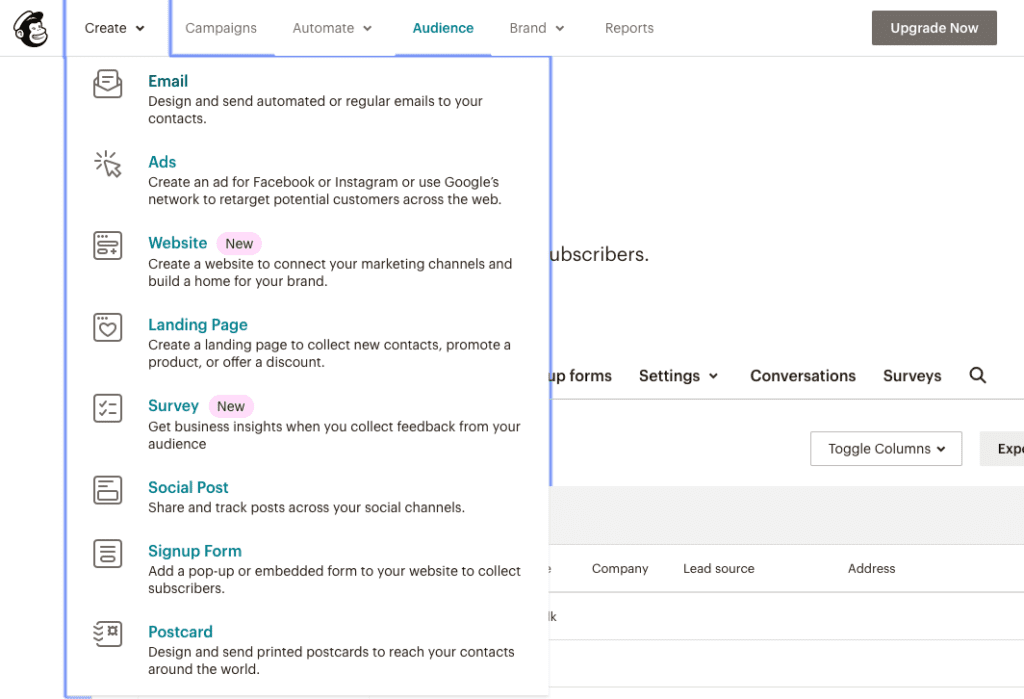
3. Create an email campaign
After you have created your audience, create an email campaign. Name your campaign, choose your audience and update the campaign details.

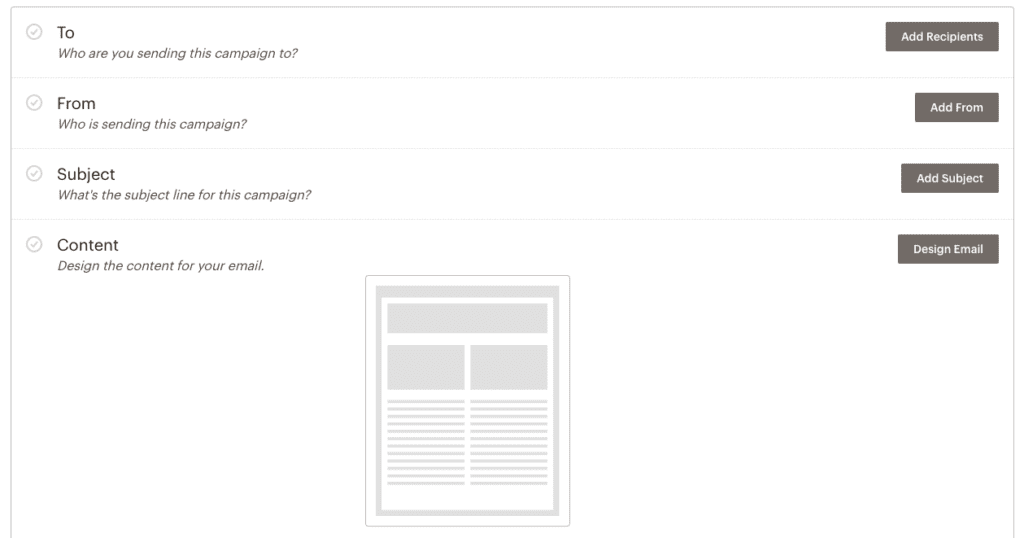

4. Design your wedding invitation email
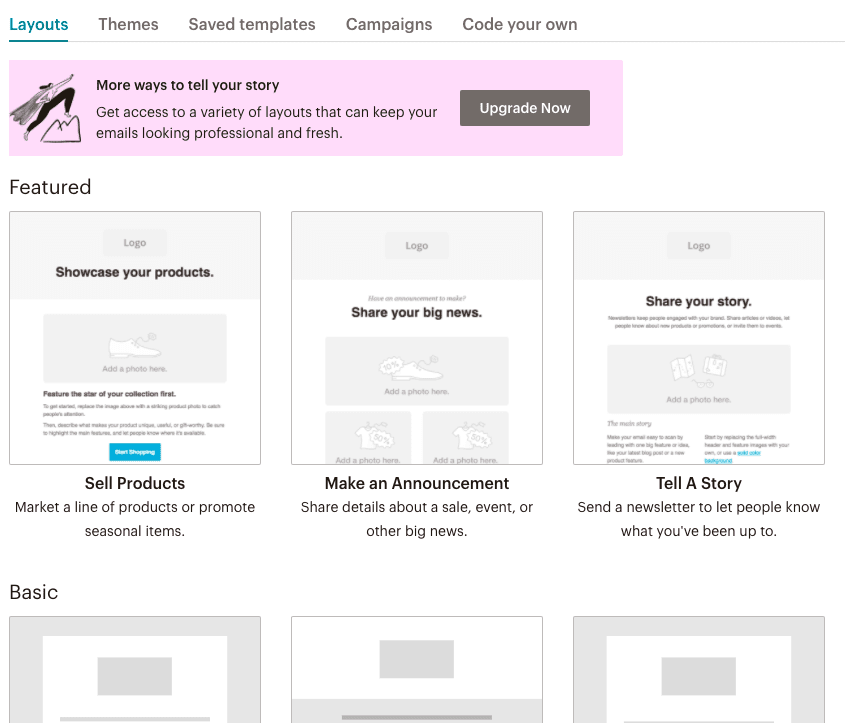
Choose a template for your email from the campaign builder content section. You can choose from several options: featured layouts, basic layouts, themed templates, saved templates, or even custom code your own (depending on your account plan).
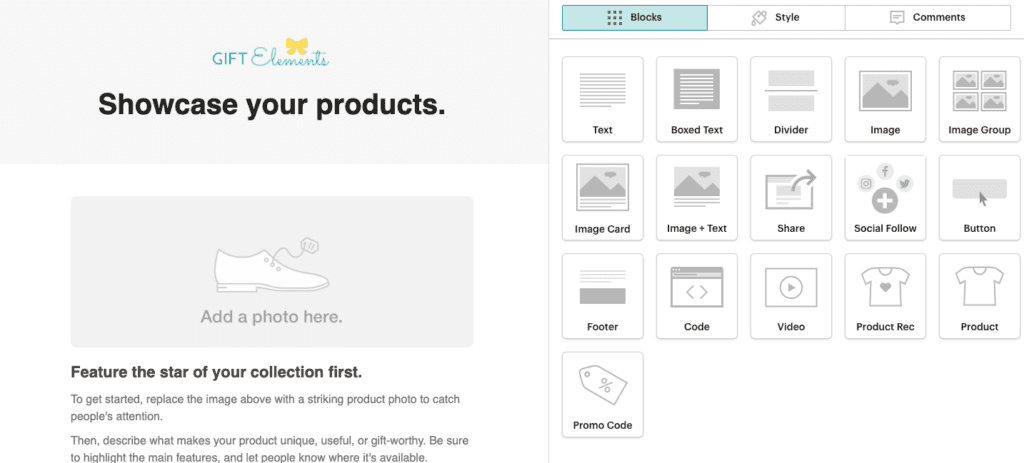
Once you have selected a template, get ready to start designing your email. Make use of the content boxes shown to add text, file links, and even upload images. Using the drag-and-drop editor, you’ll be able to rearrange, delete, and even duplicate content blocks to create the look you want. When adding text, it’s best to directly type it into the editing pane of the content block or copy-paste from simple text editors such as Notepad or TextWrangler since other systems can add styling to your text that you don’t want. You can even select the Clear Styles option from the editor toolbar if styling is added when you copy-paste text. You can edit the styling of your text for different sections using the following three options:
- Section Style tab
- Content Block Style and Settings tabs
- Editor toolbar for text line-to-line styling


5. Include RSVP (Paid Account)
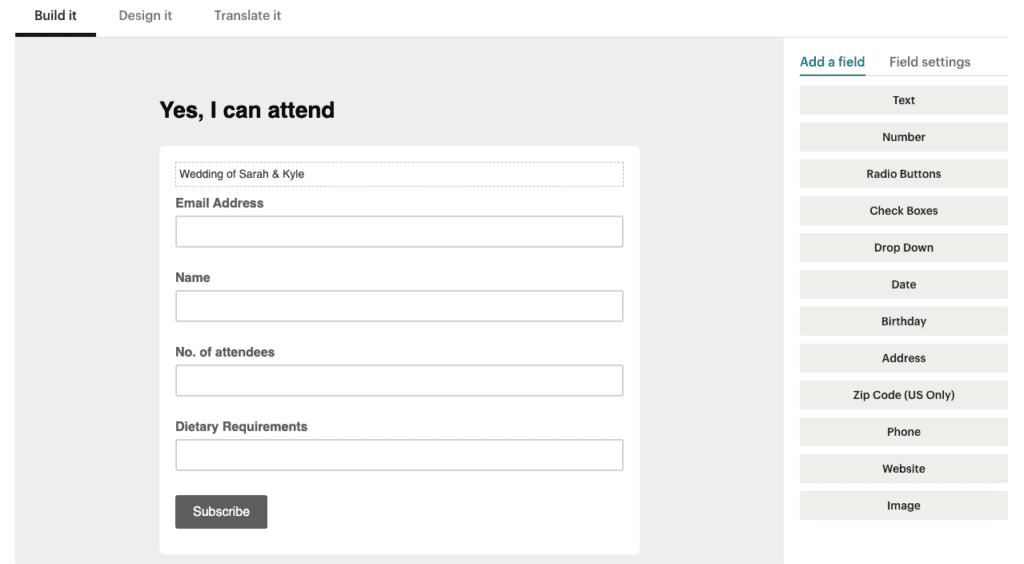
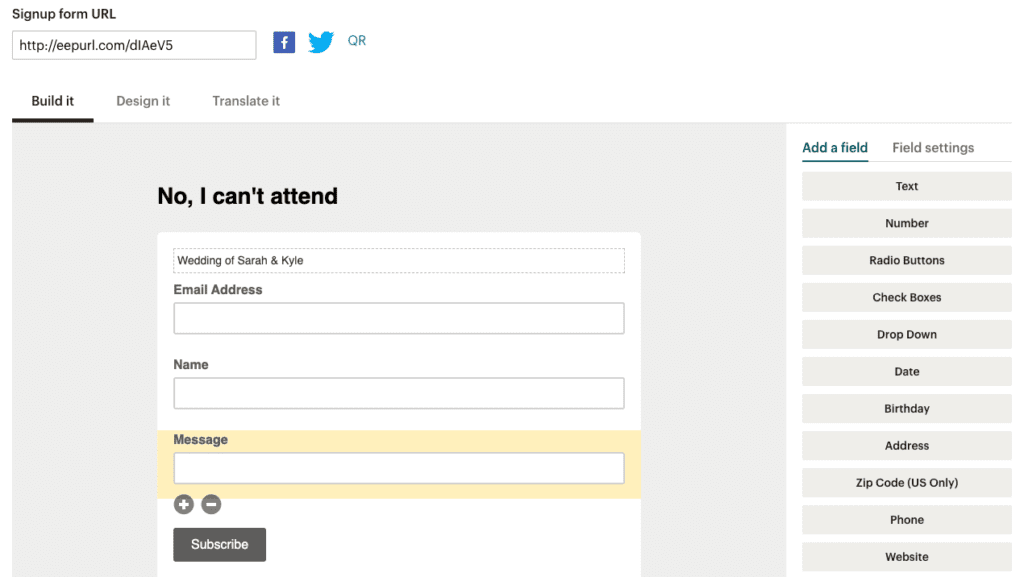
Once you’re happy with the look you’ve created, you’ll have to make an RSVP list. Your design will be incomplete without the RSVP option. Make sure to add buttons to your email design that guests can click on to send RSVPs for their attendance. One button for “Yes, I can attend” and another button for “No, I can’t attend”. You do need to create 2 new audience lists in order to capture these guests who have RSVPed. This means you may need to upgrade to a paid account. Name these audience lists “Yes RSVP” and “No RSVP”, respectively.
Go to the RSVP audience and create a sign up form using the Form Builder for each audience. Then, copy the form URL links and assign them to the respective RSVP buttons in your email design. You can even automate welcome messages so that a “Thank you” is sent out to your guests who are automatically listed in the respective audience list. It is now convenient to prepare an email reminder for guests to be punctual when arriving at your special event.


6. Include RSVP (Free Account)
If you are on a Free Account, you can only create one Audience. In this case, similarly create buttons on the Design Email page. This time link these buttons to your email address. For example, a “Yes, I can attend” and a “No, I can’t attend” button are both created and linked to your email address. For each button, prepare a preset message containing the guests decision whether to attend the wedding. If the guest rejects the invitation, you can also add a short questionnaire in the preset email message asking for a reason.
This way you will receive guest RSVPs via your email. You will need to manually update the guest attendance on Mailchimp. To do this, go to the Form Builder of your Audience list and add fields to indicate guest attendance. Then go to your Audience list and click the guest name you wish to update. Change the attendance status on the guest profile page.
7. Send Email
Before you send out the wedding invitation email campaign, send a test email to yourself. Once you are happy with it, you can click send or even schedule for the email to be sent out later.
8. Pros and cons of sending wedding invitations via email marketing
Emailing out wedding invitations is a better option for environmental reasons. It saves paper and can reach out to a large number of people in a short span of time. A lot of time is saved from licking stamps and travelling down to the post office. Email marketing tools can help you to produce well-designed wedding announcements and convey all the necessary information to your guests so that they can join you.
It is easy to keep track of those who have RSVP’d for the wedding and add links or files that you want to share. However, some people may miss the invitation if they haven’t checked their emails and elderly folks may not even have email addresses. In some cultures, wedding invitations need to be handed personally as a sign of respect. Another drawback of emailing out digital wedding invitations is that it lacks the palpability offered by paper invitations, which are capable of helping people experience emotions associated with a wedding.
Emailing out wedding invitations, however, can be used ancillary to paper invitations to send out reminders and communicate changes to your guest lists. While digital invitations may not entirely replace paper invitations, they can help make your wedding preparations more efficient.


